The dining reservation window at Walt Disney World opens 180 days before your meal. I love this handy dandy tool for figuring out the exact date(s) I need to keep in mind. If you’ve got your eyes on Be Our Guest or Cinderella’s Royal Table, you’ll want to be online or on the phone as early as possible on your 180 day mark. I’m not kidding. You may stumble on cancellations closer or even luck out with something the day of, but the closest you’ll even get to a guaranteed meal at either restaurant is to be rarin’ to go at 180 days.
Disney resort guests get the added perk of being able to book 180 prior to their check-in date and up to ten days after. For most guests, this covers their entire stay. If you’re not a Disney resort guest or don’t have your reservation booked at the 180 day mark, you’ll be scheduling 180 days prior to each reservation you’re hoping to secure. If you’re more flexible with restaurants, you can wait until 180 days prior to the last day of your vacation and do it all in one shot.
If you’re not lucky enough to have a fantastic travel agent making your reservations for you, you can always call (407) WDW-DINE and have the cast members do most of the leg work. However, now that dining reservations can be made online, I much prefer this method.
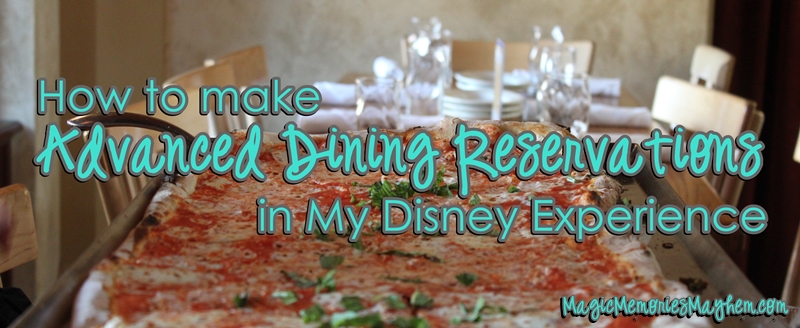
How to Make Advanced Dining Reservations in the MyDisneyExperience App
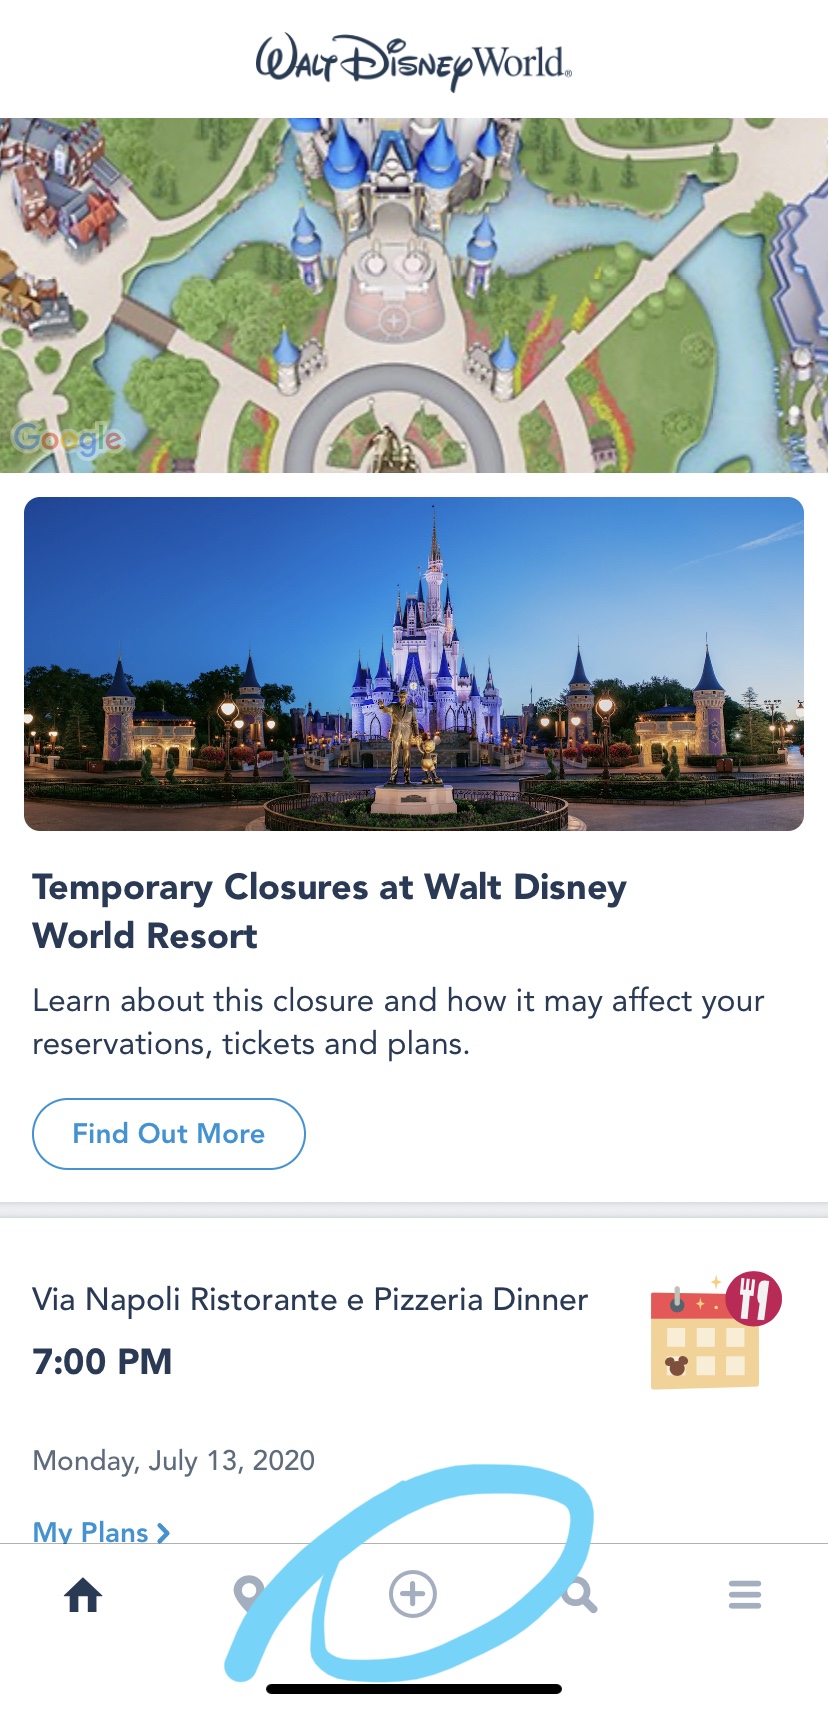
1. Open the app
Tap the + on the bottom of the screen. Also, sad face at that top blurb. 😢 I’m updating this post on April 1, 2020 but it’s most certainly not a prank.
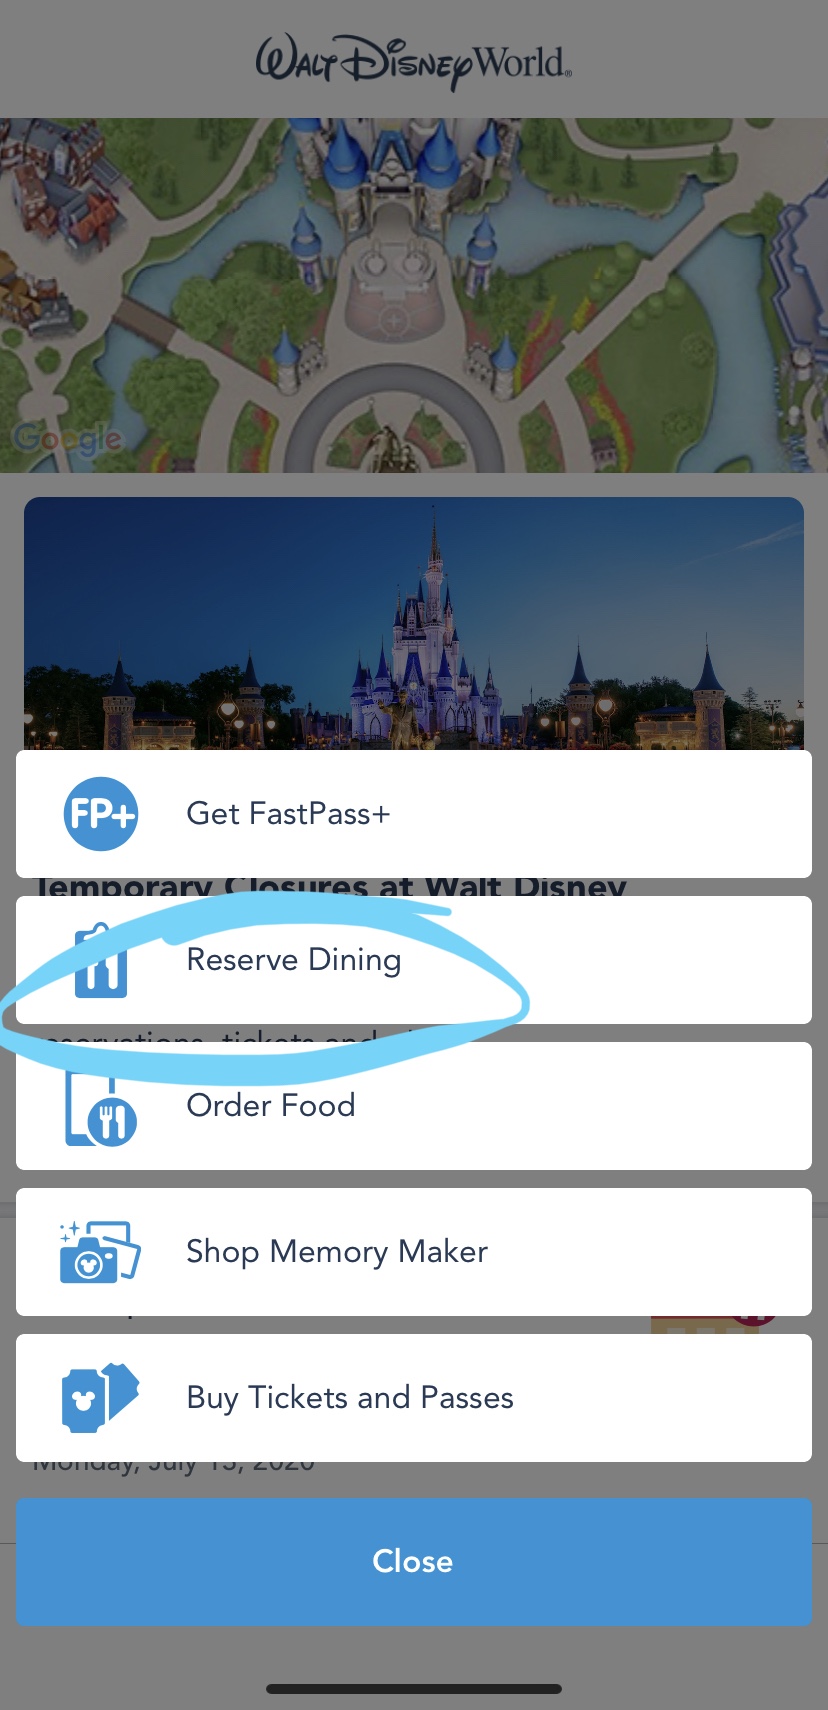
2. Choose your task
Tap “Reserve Dining.”
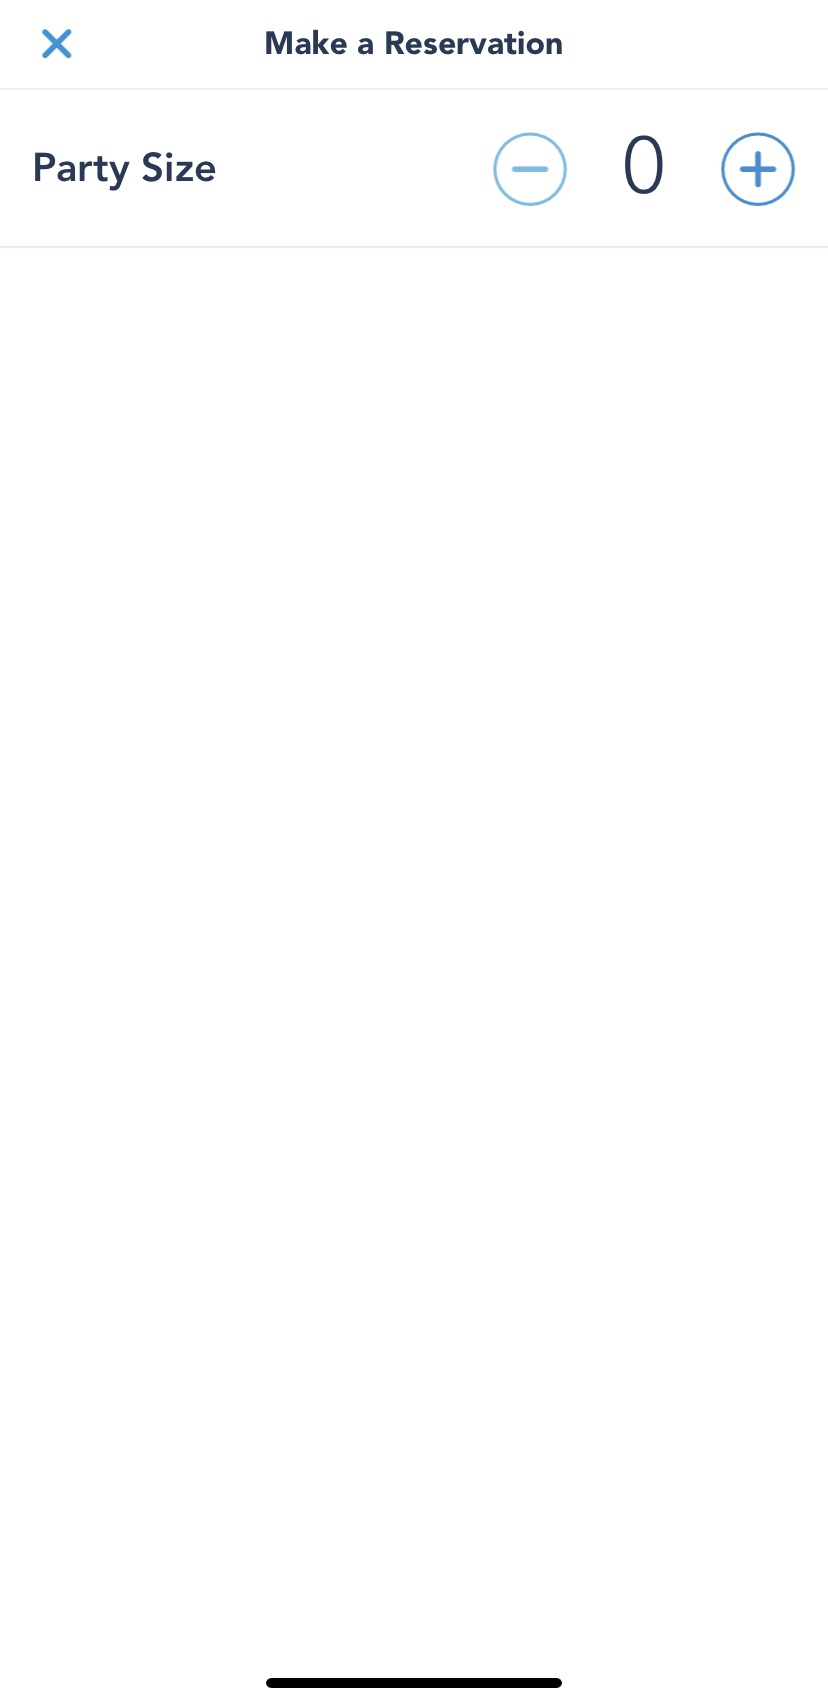
3. Select party size
For parties over 20, you’ll need to call or make multiple reservtions in different accounts.
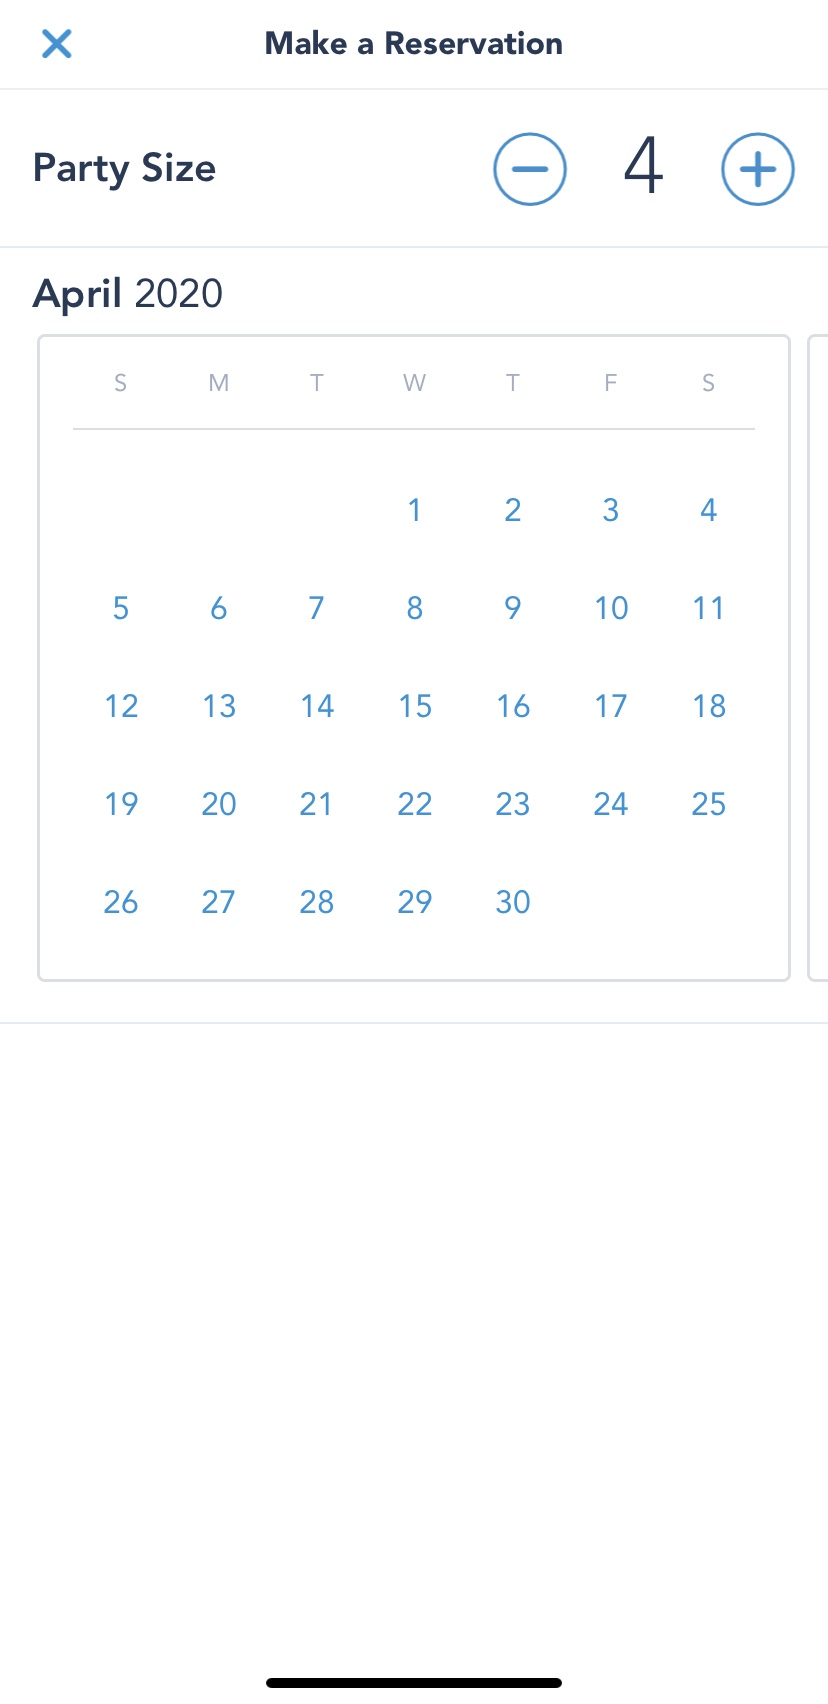
4. Select your date
Reservations can be book 180 days out or 180+10 if you’re a Disney resort guest.
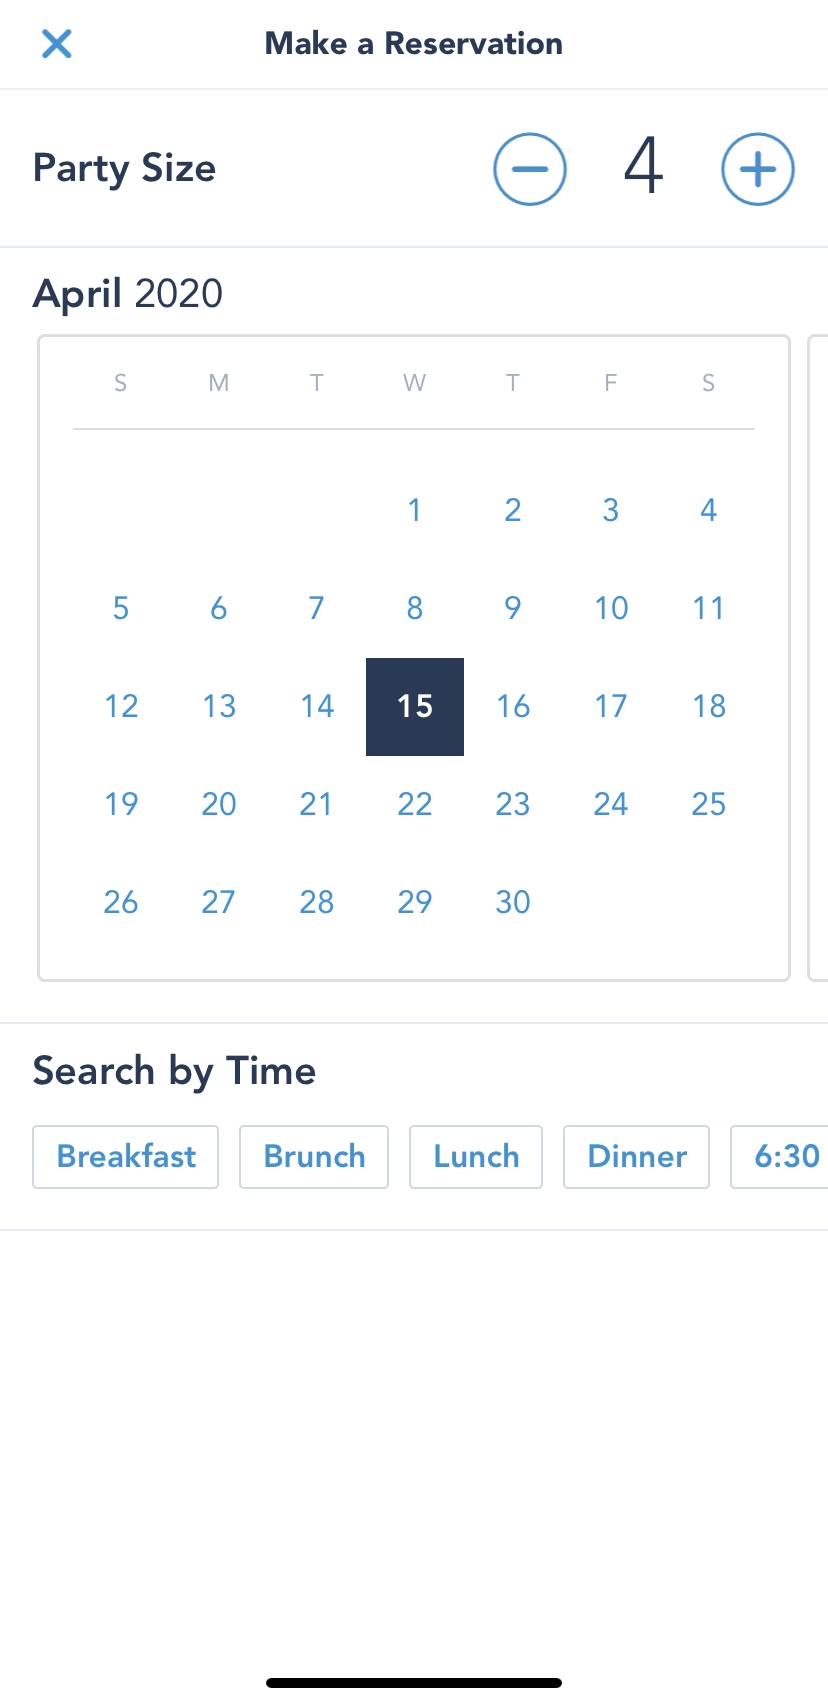
5. Select your time
You can choose from general meal times or specific times. More ability will show with meal times chosen instead of specific times.
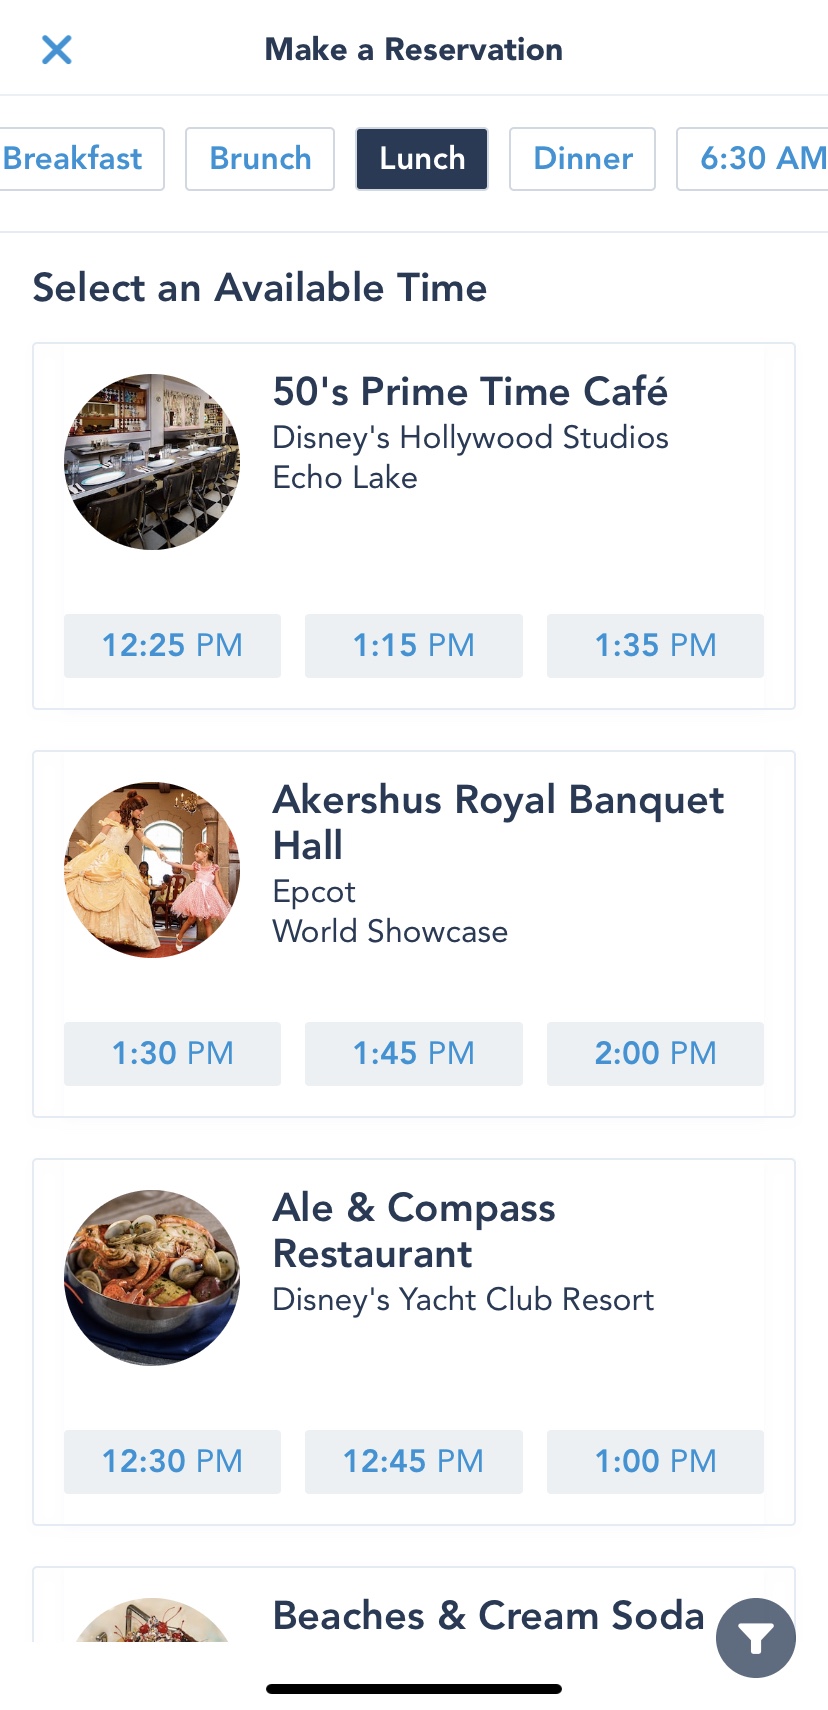
6. Choose your restaurant and time
Scroll through availability and pick your favorite! We’re going with 50s Prime Time Cafe!
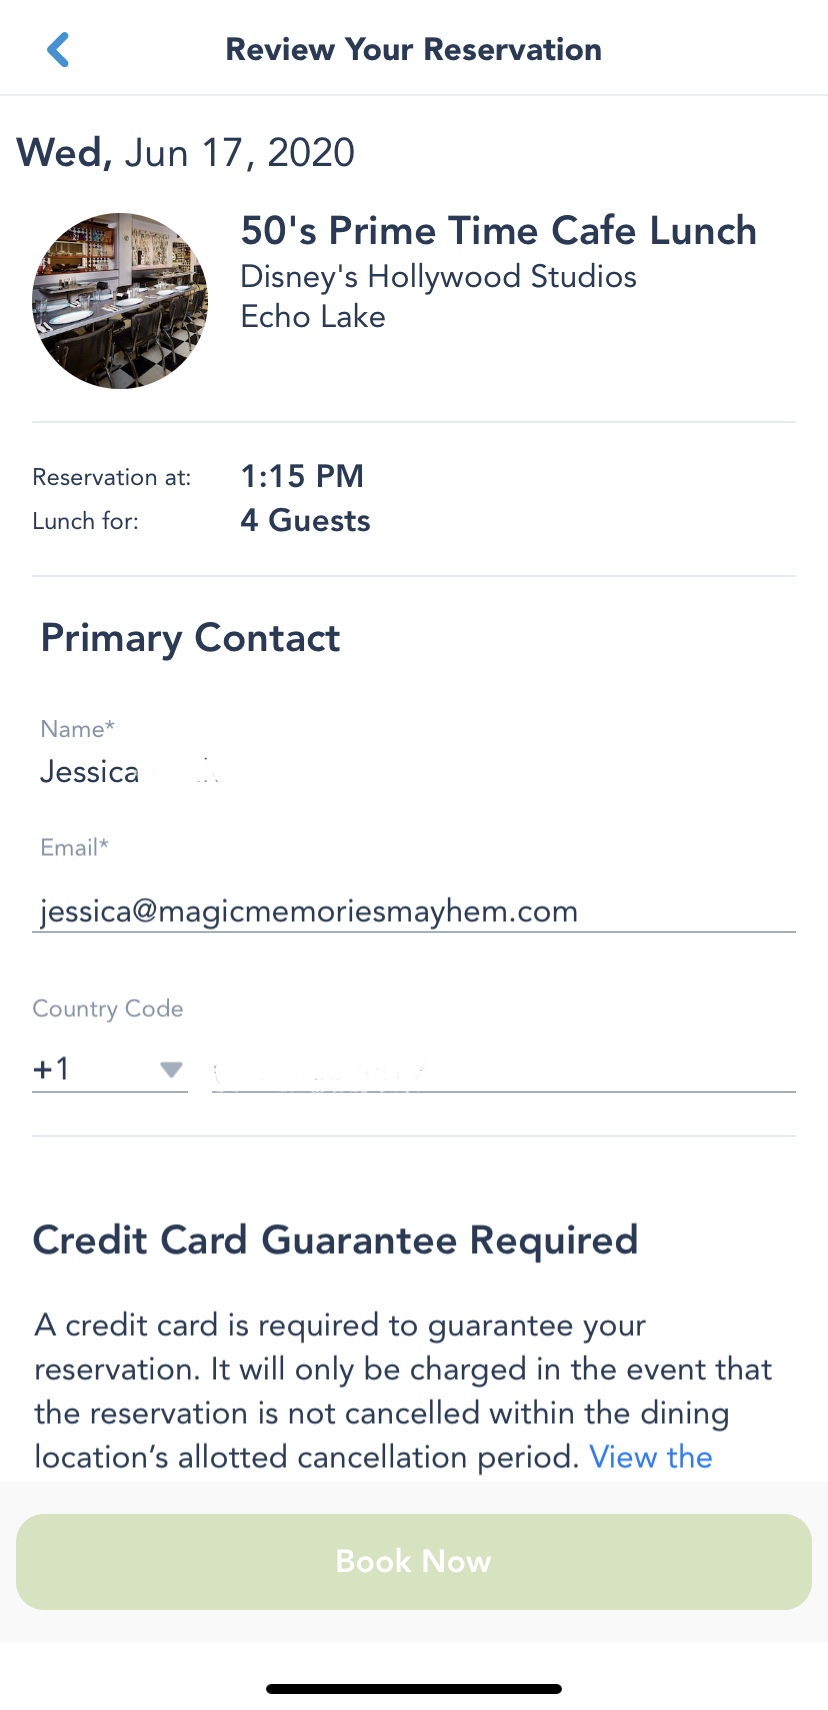
7. Review your reservation
Check your reservation for accuracy.
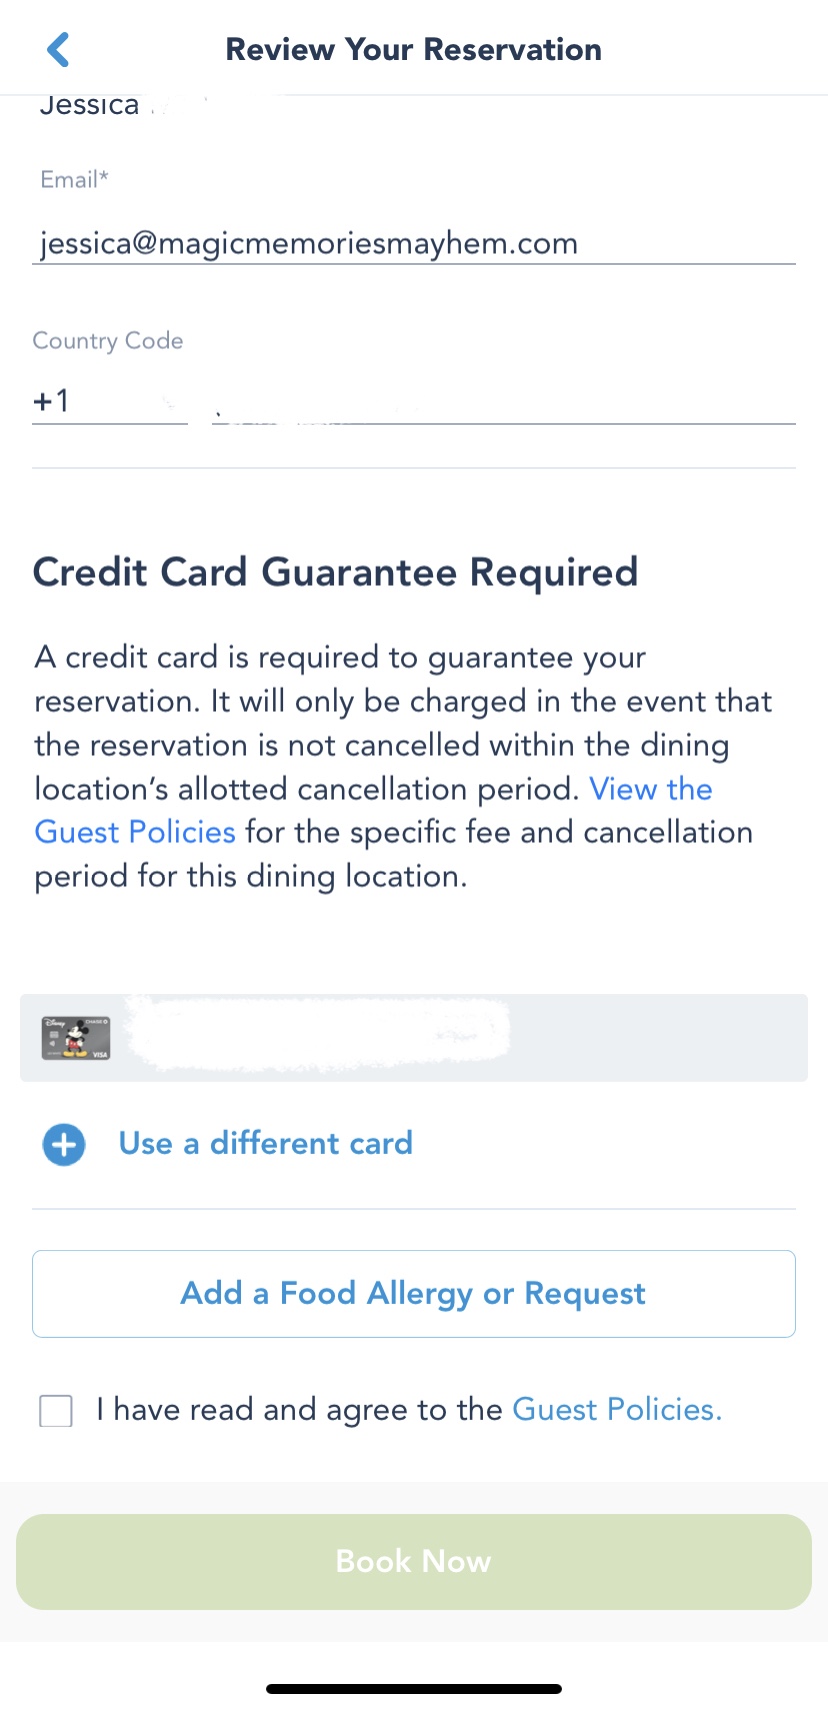
8. Confirm your credit card info and add special needs
If you already have a payment method entered, it will auto-populate. If not, enter it here. On this screen, you will also add any special needs. Check the tick box and tap “Book Now” to confirm.
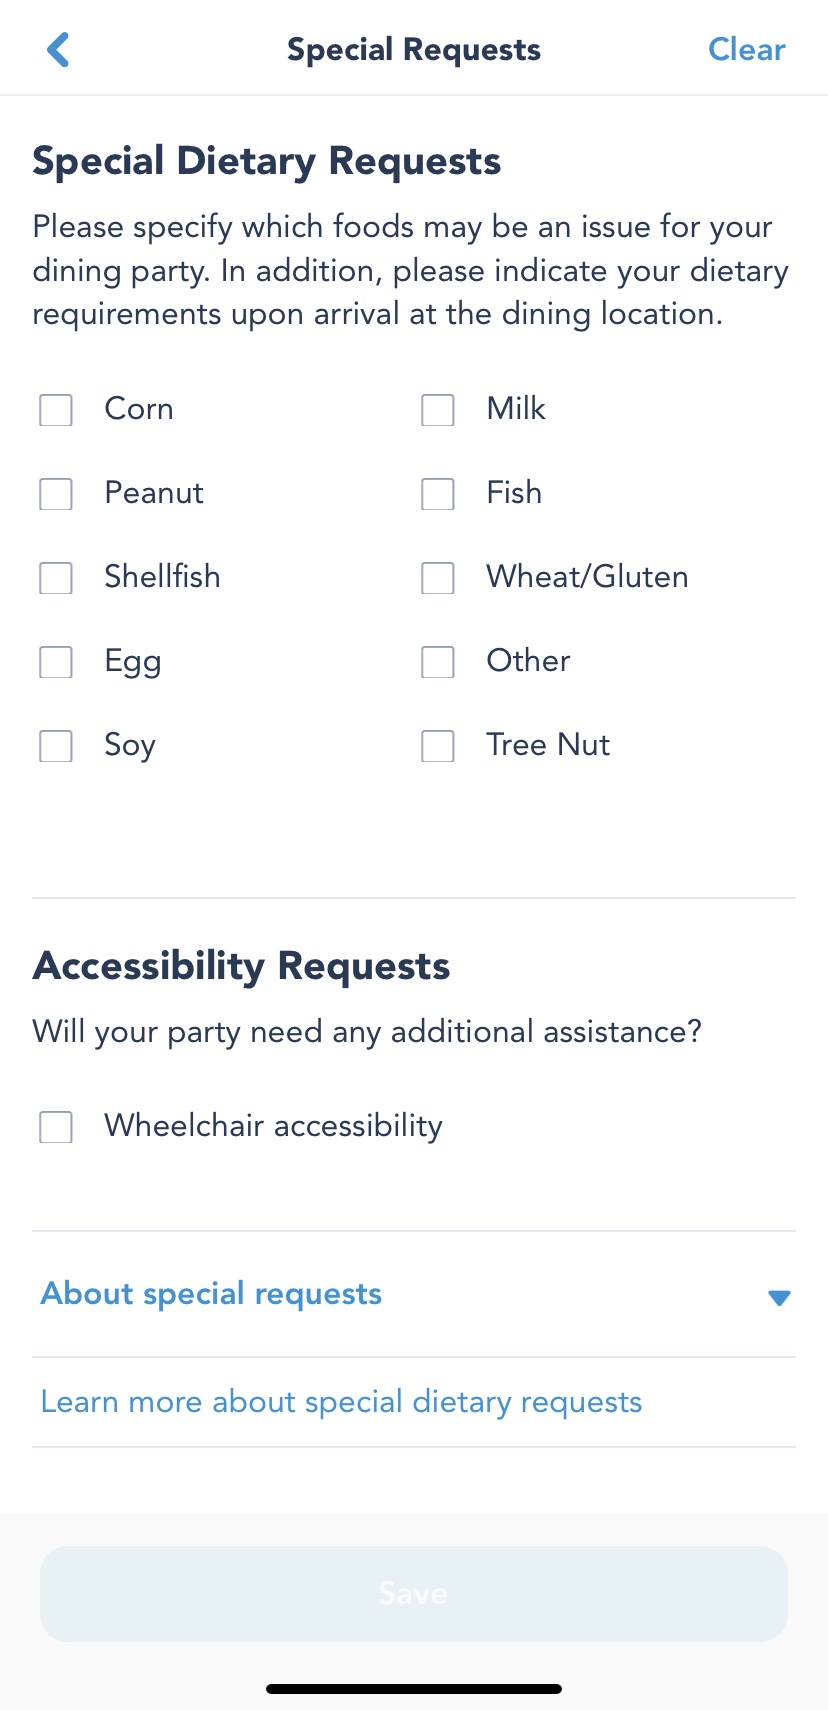
9. Add special needs (optional)
Prior to booking, you will note special needs here if needed. If you’ve forgotten to note these, you can add them via phone or in person. If the check-in cast member does not mention special needs, be sure to speak up. Here is information on dining with food allergies at Walt Disney World.
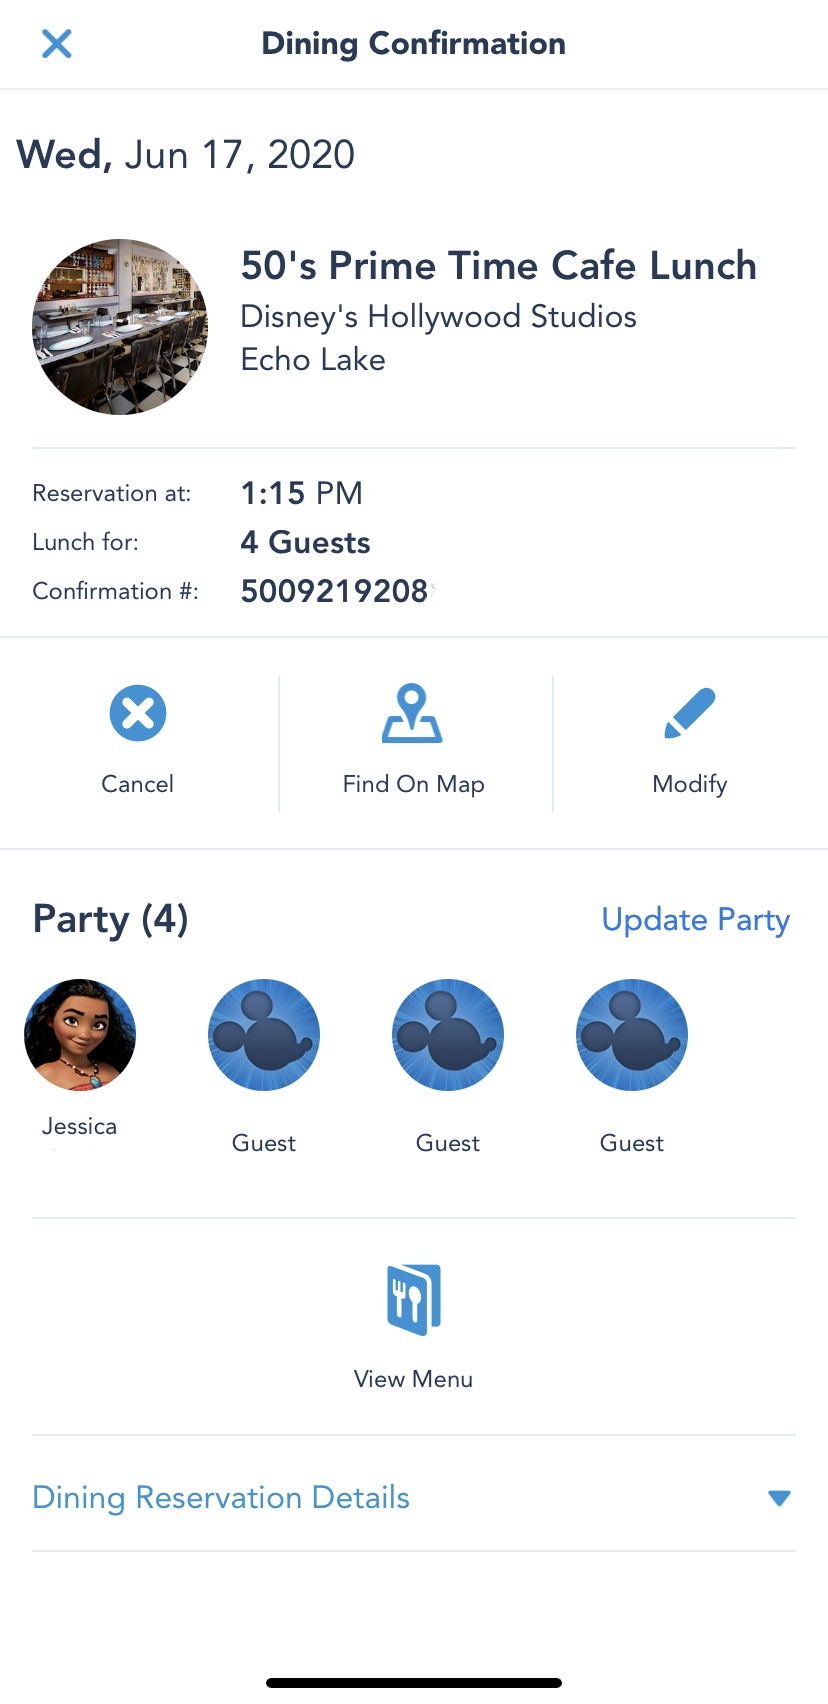
10. All set? You bet!
Once confirmed, you’ll receive an email, as well. You can also revisit this screen to modify or cancel your reservation by tapping on the reservation in “My Plans” on the main page of the app.
How to Make Advanced Dining Reservations in MyDisneyExperience in the Browser
Assuming you already have a My Disney Experience account and are logged in…
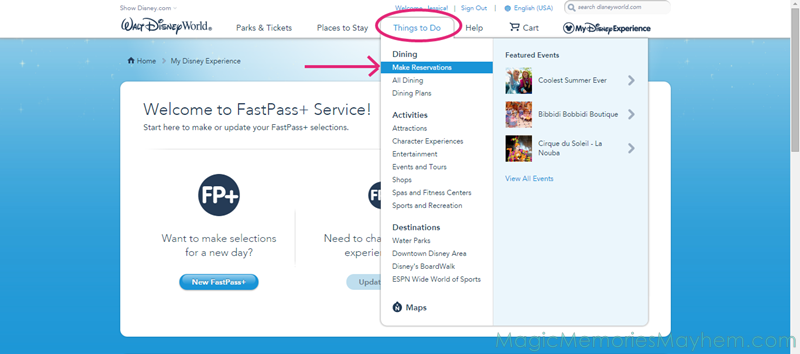
1. Find the reservation link.
There are a few ways to get to dining, but I find this is the quickest and easiest.
2. Find your restaurant.
If you already know where you want to eat, just type it in the search box. You can also filter by cuisine, location and experience (i.e., character dining). There are more filters, but those are the most useful, I think.
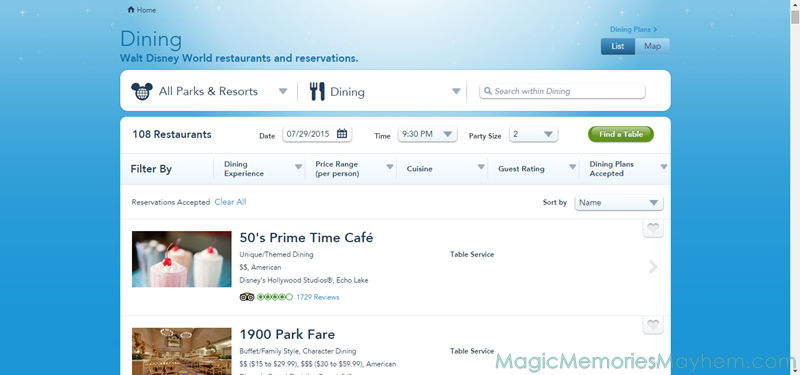

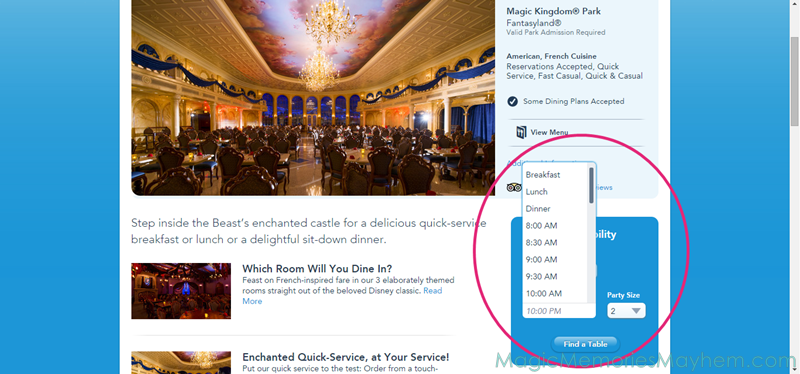
3. Choose your desired time.
You can choose an exact time and Disney will check about an hour before or after this time. Or if you’re flexible, choose a meal time (breakfast, lunch or dinner), and Disney will check for availability during the entire duration that meal is served.
Again, I’m going for the gold and looking for a next day dinner for two at Be Our Guest.
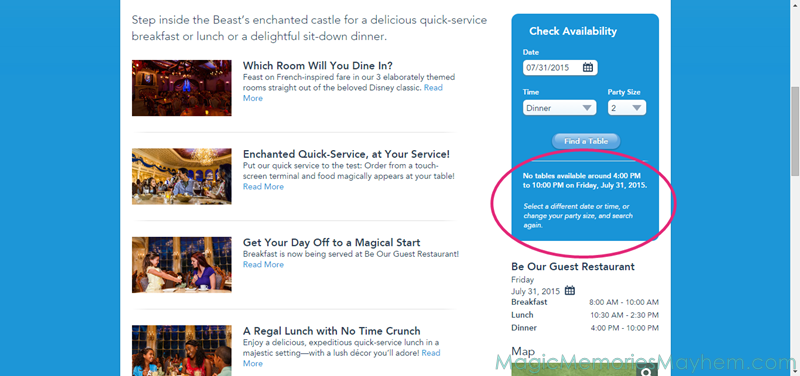
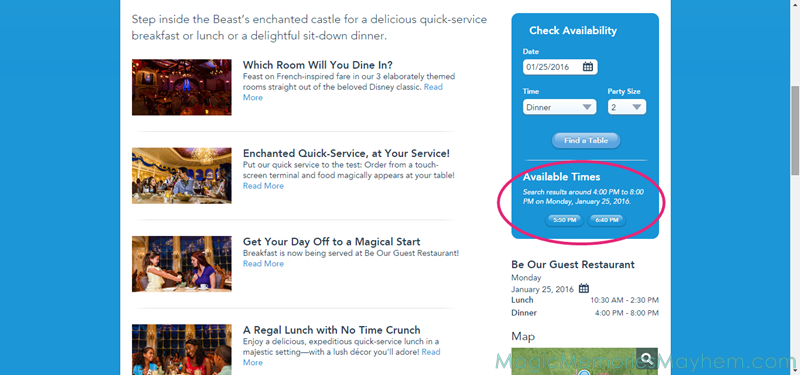
4. Select the time that works best for you.
It may not be your top choice, but snag whatever you can in the beginning. You can always recheck as you get closer to travel.
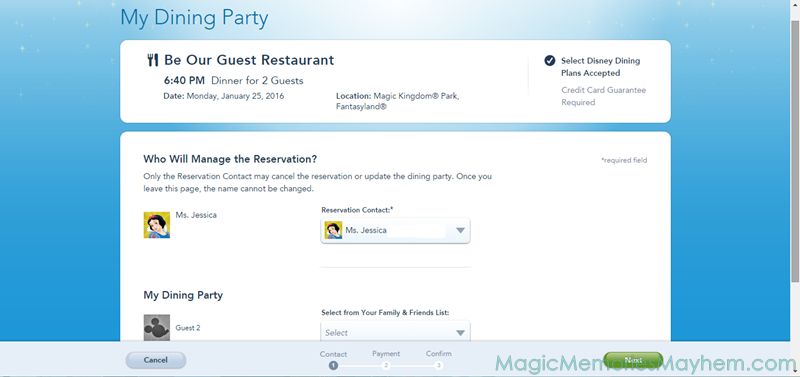
5. Choose a manager.
You’ll have to choose someone to be in charge of the reservation. It’s optional to add your guests.
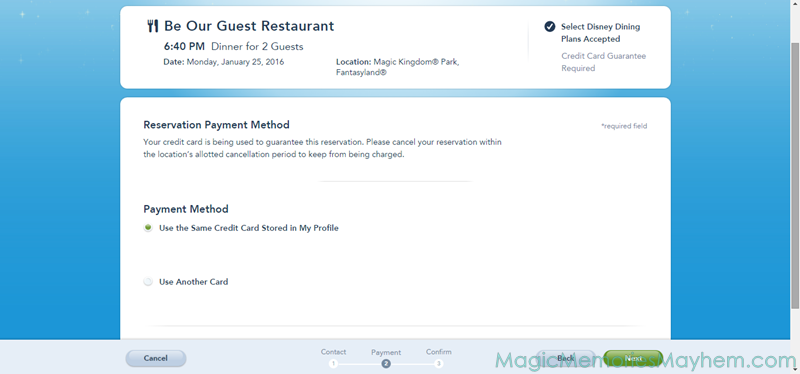
6. Enter your card information.
You won’t be charged anything at time of booking unless you’re booking Cinderella’s Royal Table or dinner shows without a dining plan that includes table service credits. Some special events also require prepayment. These will be noted prior to being charged. You’re not required to use this card for payment, but it will be charged in the event you’re on the wrong side of the cancellation policy.
Whether or not your reservation requires prepayment, all reservations require a credit card guarantee. Be sure to read the cancellation policy. In a nutshell, you’ll be charged $10 per person for no-shows or cancellations within 24 hours of the reservation. If you’re absolutely stuck, say someone is sick, I always recommend calling to cancel, as they may waive fees on a case by case basis.
7. You’re on your way to confirmation.
You’ll make sure your contact info is correct. This is your chance to read over that cancellation policy, as well as other dining policies. Check the box, and you’re almost there!
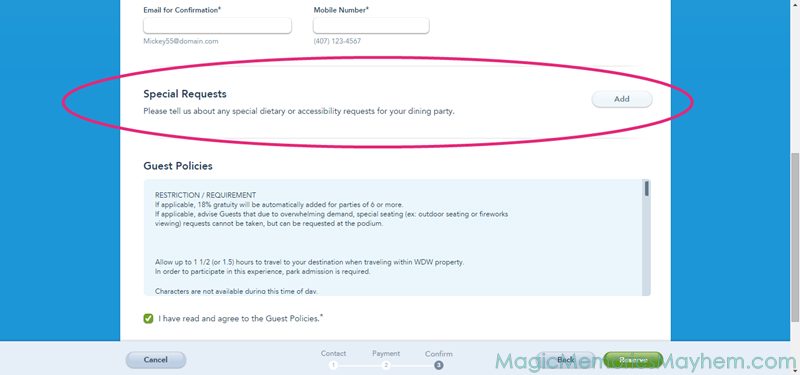
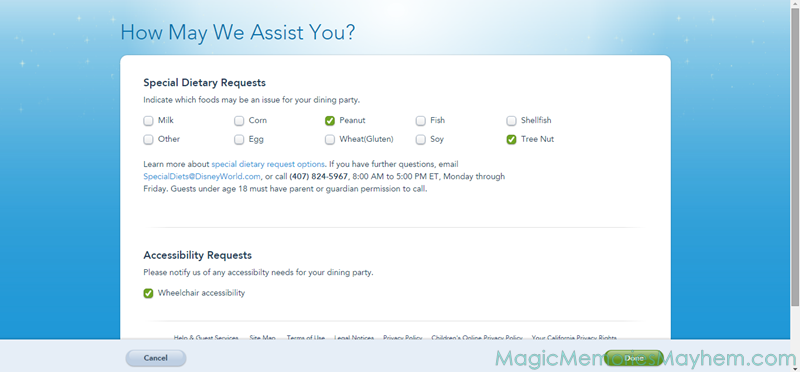
7a. Note special needs.
They have several general allergies listed, but no matter what you check, this will alert the hosts that you have a guest with special needs. They’ll chat with you in depth once you arrive, and if you have a food allergy, you can request the allergy menu and/or to speak with the chef.
8. Finalize your reservation.
Yeah, it’s kind of the same as step 7, but I have another picture. Congrats! You’re an ADR-making machine!
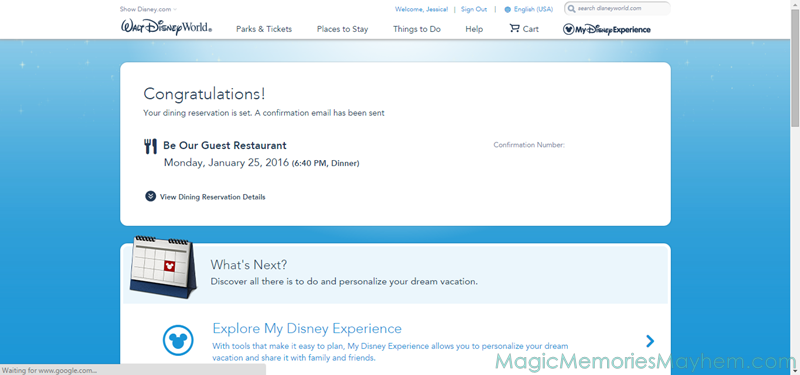
Now, back to that pesky cancellation policy…
How to Cancel a Dining Reservation in My Disney Experience
If it turns out you’re not going to take advantage of your reservation, cancel that sucker! Rarely do we have a reservation for less than six, and I know I don’t want to be out $60. I will say, however, especially if it’s a popular reservation, don’t cancel it until you absolutely know you won’t be using it. Much better to have it and not need it than to cancel it and wish you hadn’t. Just remember it’s there!
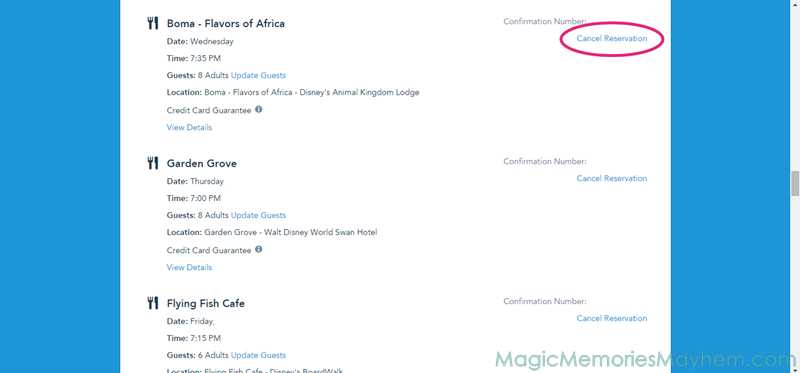
1. Find the reservation.
I usually just head to my itinerary and scroll until I find it. You’ll simply click on the “Cancel Reservation” link.
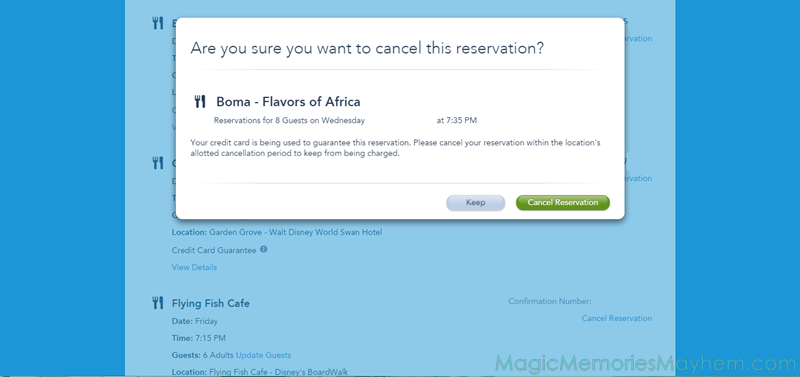
2. Confirm the cancellation.
Disney always wants to make sure you’re sure.
That’s it! You’re out of the woods.
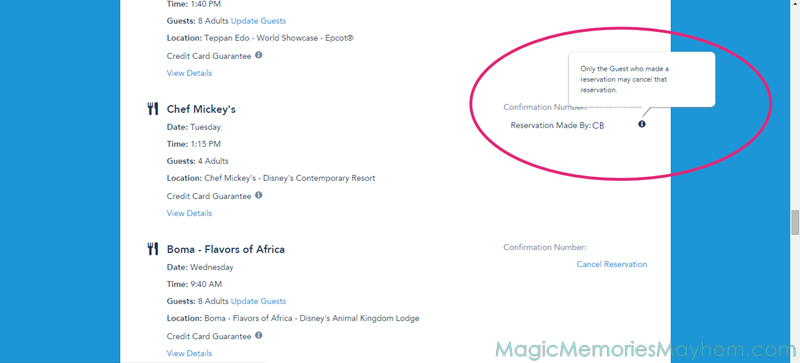
Remember when you chose a manager? I want to point out that you can only cancel reservations you manage. My girl, CB, made lunch reservations at Chef Mickey’s, and although I can see it, I can’t alter or cancel it in any way.
Let's start planning your trip full of Magic, Memories and maybe even a little Mayhem!
Enjoy complimentary concierge vacation planning when you book your vacation with us!