
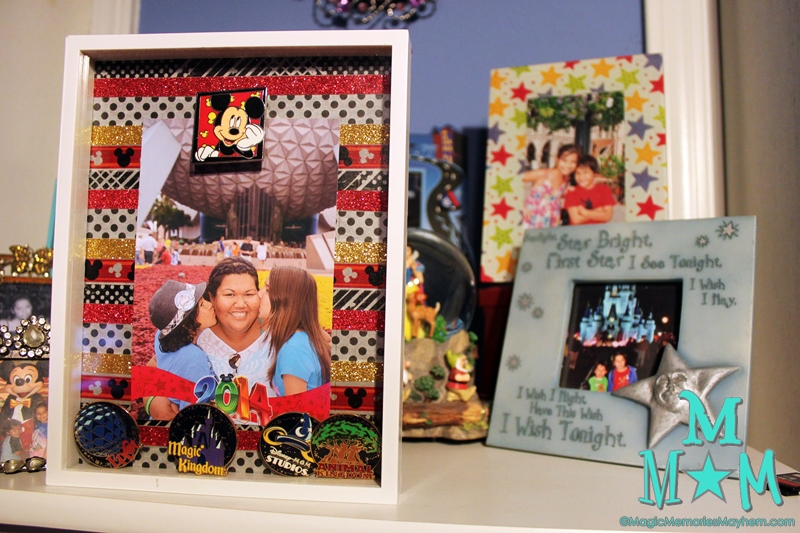
So, with the new job comes a total upset to time management and blog love, but now that the first quarter at my new school in a new district is signed, sealed and delivered, I’m hoping to get back into the swing of things, and I’m starting with this SUPER cute, SUPER easy project. After my SMASH*Book obsession of last fall turned into a full-on washi hoarding situation, I decided I’d better start doing something with all that pretty tape. I grabbed a shadow box frame I’d been hoarding, too, and got to work.

1. Snatch a Shadow Box
I used a shadow box specifically designed to be a picture frame, but any one will work as long as the washi will stick. If the back is “cushioned” as some shadow boxes are, just make sure you can wrap the tape around and secure it to the hard back side of it. Mine also happened to have a clip, but you can stick your photo up with a push pin, cute tack or even a Disney pin!

Thanks to my Target clearance obsession (even though it’s waned since they went from 75% to 70%), I picked up this cute one for less than $3.00.
2. Choose Your Weapon
I was looking for something cute to go with a picture from our MMM Epic Summer trip, so I went Mickey themed, but the sky (and your washi supply) is the limit. Go monochrome, get wild, paste the rainbow. It’s all you, baby!

3. I’d Tape That
Now comes the fun! In order to save tape, I traced the photo I planned to put in the frame. That way I wasn’t wasting any tape that would’ve been covered up anyway. If you think you might change yours out, go ahead and tape all the way across.


4. Bring on the Baubles!
The fun of a shadow box is that it’s three-dimensional, so you can stick some mementos in with your image. I had a set of Walt Disney World park pins from the kids’ first trip that were the perfect match for (pretty much) any picture I’d ever slip into this frame, so I went with those. If you’re a Disney nerd and wanting to commemorate a specific memory, consider throwing in your event pin, celebration pins, park tickets, etc. Again, your creativity is your only limit here.

Raid your pin stash for some fun shadow box bling!

For extra customization (and because Stitchy isn’t a girl), I ripped the sharp post off of the back of a pin (just kidding, I used jewelry pliers) and superglued it to the existing clip.
5. Some Assembly Required
Throw in your bling, your picture and snap that bad boy together, et voila! Your very own custom shadow box!

Hopefully this got some of your creative juices flowing! What are you putting in YOUR shadow box?